Best Finishing Techniques for 3D Printed Topographic Maps
If you’re printing a topographic map from Google Earth, elevation data, or GIS files, choosing the right finish can dramatically enhance the final look. Here are the top 3 finishing techniques for 3D terrain models:
1. Minimalist White PLA Finish
Use a clean white PLA for a modern, architectural look that highlights elevation without any painting. Best for educational or clean-display environments.
→ Recommended: Overture White PLA
2. Natural Sedimentary Rock PLA Finish
Skip the paint entirely by printing with a specialty filament that mimics stone. Overture’s Sedimentary Rock PLA adds texture and visual depth right off the print bed.
→ Recommended: Overture Sedimentary Rock PLA
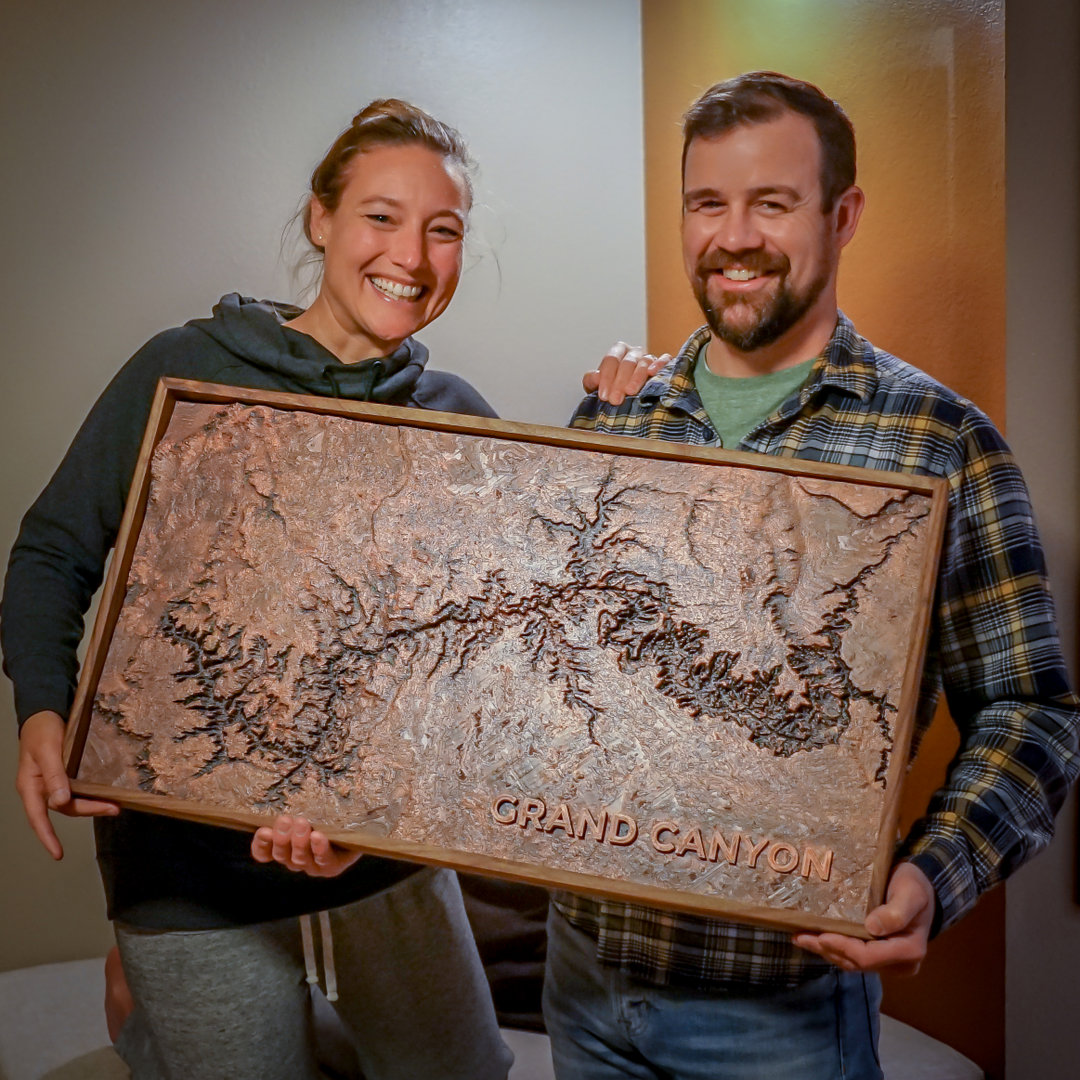
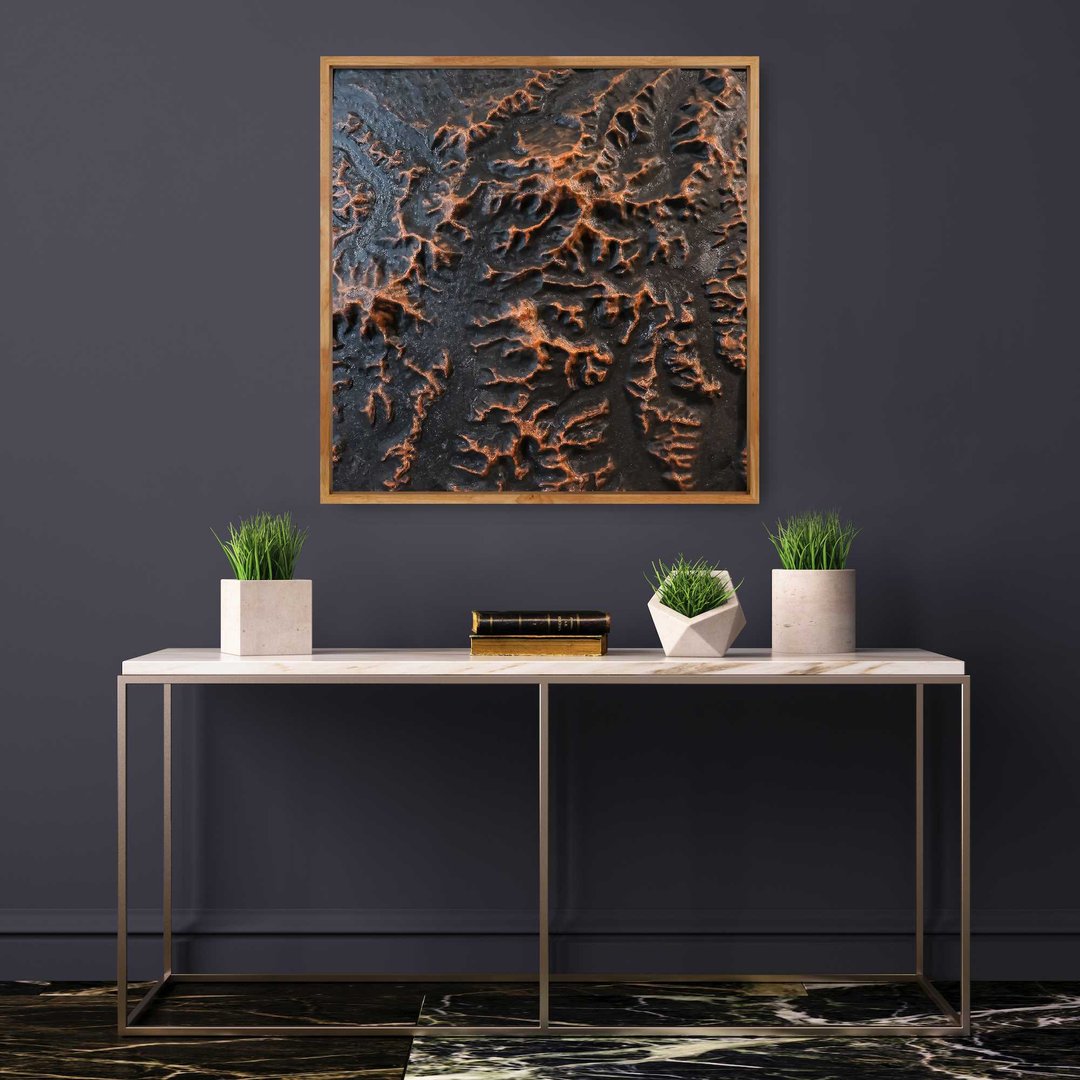
3. Painted Bronze and Copper Finish
For a museum-style display, prep your model with light sanding and filler, then apply a bronze spray base and highlight ridges with copper luster paste. Seal it with a satin clear coat for durability and shine.
- Bronze Base: Rust-Oleum Metallic Oil-Rubbed Bronze
- Highlight: DecoArt Metallic Lustre Wax in Copper Kettle
How to Finish a 3D Print of Topographic Terrain: A Step-by-Step Guide
Creating a 3D-printed topographic model is a rewarding way to bring landscapes to life—but raw prints often fall short of their full visual potential. Whether you’re aiming for a natural stone look straight off the printer or planning to hand-finish your terrain with rich metallics, the right filament and finishing techniques make all the difference.
Table of Contents
In this guide, you’ll learn how to:
- Choose PLA that eliminates the need for paint
- Prep your print for professional-looking paint adhesion
- Apply a base coat and copper highlight that enhances elevation
- Protect your model with a clear satin finish
Let’s dive in.
Choosing the Right PLA: Painted vs. Unpainted Finishes
Not every terrain print needs paint. Some PLAs have a natural aesthetic that works well as-is, especially for display pieces that don’t require dramatic visual contrast.
Solid White PLA for a Clean, Architectural Look

White PLA offers a crisp, minimal look ideal for stylized or educational displays. When printed cleanly, the result is a terrain model that resembles plaster or ceramic.
Overture’s Sedimentary Rock PLA: No Paint Needed
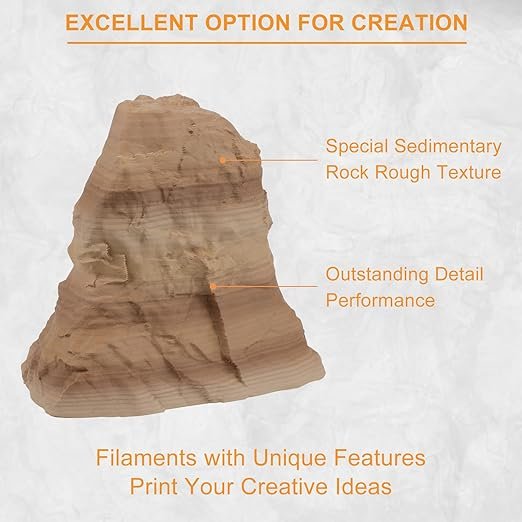
This unique PLA blend from Overture contains flecks and color variation that resemble natural rock or sediment layers—perfect for prints that require texture and visual interest without post-processing.
When to Choose Paint Over Raw PLA
If you’re aiming for high contrast between elevations, a metallic or weathered look, or a model that stands out in low lighting, painting gives you full control over tone and detail.
Preparing Your Terrain Print for Painting
Even a great print benefits from finishing prep. Sanding and filling imperfections ensures that your paint sticks well and enhances your terrain’s shape—not its flaws.
Why Surface Prep Matters for Realistic Results
- Helps paint and wax adhere smoothly
- Preserves crisp elevation lines and texture
- Eliminates the plastic sheen of raw filament
Light Sanding: Smoothing Without Losing Detail
Use 220–400 grit sandpaper to gently smooth layer lines, especially on flatter areas. Be careful not to round off sharp ridges or obscure fine topography. Wet sanding with water can help reduce dust and static buildup.
Filling Gaps with Plastic Wood
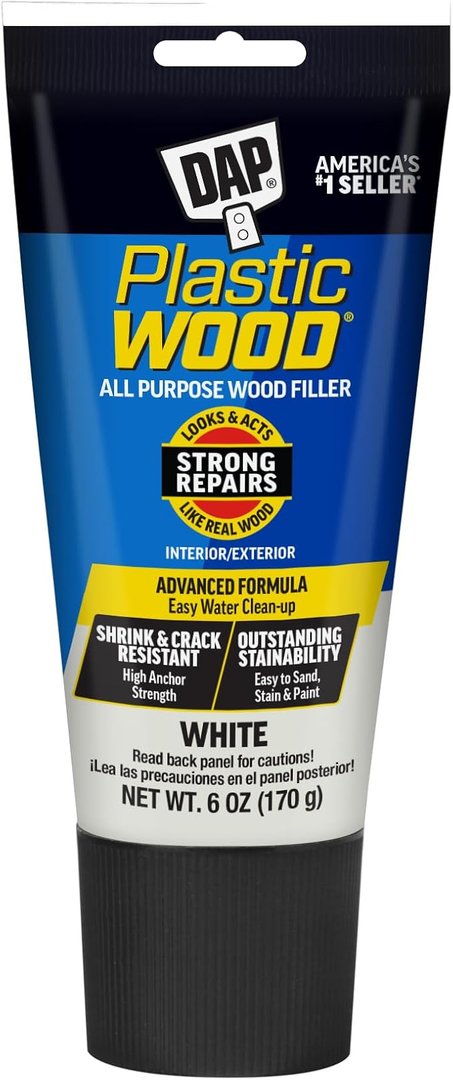
For small holes, seams, or under-extruded spots, apply DAP Plastic Wood All Purpose Latex Wood Filler. It bonds well to PLA, sands easily, and blends in seamlessly under paint.
- Apply with a spatula or gloved finger
- Let it dry fully before sanding
- Use a light touch to preserve surface texture
Clean Before Painting
- Brush or blow away dust with compressed air
- Wipe with isopropyl alcohol to remove oils
- Ensure the model is completely dry before moving to the paint stage
Base Coating with Rustoleum Metallic Spray Paint

Your base coat sets the tone for the entire finish. Rust-Oleum All Purpose Metallic Oil-Rubbed Bronze Spray Paint provides depth, richness, and a subtle shimmer that mimics weathered rock or metal.
Why This Color Works
- Dark bronze enhances terrain contrast
- Metallic flecks add dimension
- Neutral undertone supports both warm and cool highlights
Best Spray Practices
Pro Tips for Even Coverage
- Hold can 8–12 inches from the model
- Spray in smooth, side-to-side passes
- Apply 2–3 light coats with 10–20 minute drying time between
- Use a rotating base or lazy susan to coat all angles evenly
Avoid These Common Mistakes
Common Pitfalls
- Spraying too close can cause drips
- Humid or cold conditions may lead to bubbling
- Overcoating in valleys can obscure fine details
Highlighting Elevation with Metallic Luster Paste
Once the bronze base is dry, it’s time to accentuate the terrain with DecoArt Metallic Lustre Wax in Copper Kettle. This paste adds warmth and highlights to high points, peaks, and ridgelines.
Why Luster Paste?
- Adds realistic metallic shine to raised areas
- Copper contrasts beautifully with bronze
- Easy to control and layer for subtle effects
Sponge Application Tips
Application Technique
- Cut a small piece of kitchen sponge for better control
- Dab, don’t rub—lightly pat raised surfaces
- Start light and build up gradually for natural highlights
Accentuating Elevation
- Focus on peaks, ridges, and plateaus
- Use angled lighting while working to see where highlights will catch
- Feather edges with a dry sponge or finger to soften transitions
Buffing and Blending
- Let dry, then gently buff with a soft cloth
- Optional: Add a second metallic tone for layered effects
- Clean up edges with a cotton swab and alcohol if needed
Enhancing and Protecting the Final Model
To seal in your work and protect it from wear, apply a few light coats of clear satin polyurethane spray. Satin finishes enhance color and sheen without overpowering subtle topographic detail.
Why Satin Poly Is Best
- Preserves paint and wax from handling damage
- Adds durability and water resistance
- Provides a professional, low-gloss finish
Spray Application Tips
Final Coating Process
- Shake well and spray 10–12 inches from the surface
- Use smooth, overlapping strokes
- Apply 2–3 thin coats with full drying time between
- Allow 24 hours to fully cure before handling or packaging
Final Display Tips
- Mount your model on a wooden or acrylic base for a finished look
- Use angled lighting to emphasize elevation and texture
- Dust occasionally with a soft brush—no cleaners needed
With these techniques, your 3D-printed topographic terrain will transform from a basic print into a professional-looking display piece that showcases the natural beauty and complexity of the landscape it represents.