Quick Summary
There are many ways to 3D print terrain models. This guide compares three top methods based on ease, control, and print quality:
- TouchTerrain – Fast, web-based STL export tool for beginners
- OpenTopography + QGIS – Intermediate workflow with more customization
- Blender + Fusion 360 – Advanced modeling for detailed terrain and cityscapes
Each option includes tutorial videos to get you started fast.
📘 Table of Contents
There are many ways to 3D print terrain models, from simple web tools to advanced software. This guide compares three popular methods to help you choose the right one based on your experience level, customization needs, and output quality.
Tutorial 1: TouchTerrain – Fast and Easy Web-Based Terrain Exports
Skill Level: Beginner | Quality: Medium | Customization: Low
While there are several web-based tools for generating 3D terrain models—including Terrain2STL, Cadmapper, and 3D Terrain Generator—TouchTerrain stands out as the most reliable and user-friendly option. Developed by Iowa State University, TouchTerrain is open-source, regularly updated, and specifically designed for 3D printing terrain. Unlike some alternatives, it provides built-in controls for vertical exaggeration, tiling for large prints, and support for a wide range of elevation datasets.
Summary of the Process:
- Visit TouchTerrain.
- Select an area using the map or coordinates.
- Customize tile size, scale, resolution, and exaggeration.
- Choose STL format.
- Export and download the model.
Skill Level: Beginner-Friendly
No GIS or CAD experience is required. The web interface walks users through every step with clear defaults and explanations. Even first-time users can generate an STL file in under 10 minutes. It’s an ideal starting point for hobbyists or educators who want to avoid the complexity of software installations or data prep.
Quality: Good for Small-to-Medium Prints
TouchTerrain balances usability with print quality. The models are based on real elevation data (including SRTM and other regional sources) and are suitable for 3D printing with moderate detail. While not as high-resolution as custom workflows in GIS or Blender, the output is clean and consistent, especially for natural terrain features like mountains, valleys, and rivers.
Customization: Basic but Sufficient
Customization is limited to resizing, scaling, tiling, and setting vertical exaggeration. Users can also export models in multiple file formats (STL, OBJ, GeoTIFF), which is useful if you plan to refine the model later in other software. However, there’s no support for editing terrain features, adding labels, or incorporating structures—this is strictly for raw elevation-based models.
In summary, TouchTerrain is ideal for quick, clean prints of natural landscapes, making it perfect for educational models, trip mementos, or topographic art.
Tutorial 2: OpenTopography + QGIS – Intermediate Workflow with More Control
Skill Level: Intermediate | Quality: High | Customization: Moderate
Software Used: QGIS (free) | DEMto3D Plugin (free) | Microsoft 3D Builder (free & optional)
For users ready to step beyond browser-based tools, OpenTopography’s method using QGIS and the DEMto3D plugin offers a more hands-on approach to creating terrain models. This workflow requires installing desktop software but unlocks greater control over elevation data and model parameters. OpenTopography provides high-quality, global datasets and detailed instructions for processing and printing terrain. Unlike TouchTerrain or Terrain2STL, this method gives users access to a broader range of export settings and finer detail.
Summary of the Process:
- Download DEM files from OpenTopography.
- Open them in QGIS.
- Install and use DEMto3D to configure terrain model and export STL.
- Optionally add text in Microsoft 3D Builder.
Skill Level: Intermediate
This method requires basic familiarity with GIS software and 3D workflows. Installing QGIS and using the DEMto3D plugin involves a learning curve, but the OpenTopography guide and online community offer solid support. Users comfortable with file downloads, plugin installations, and spatial tools will find the process manageable.
Quality: High
QGIS allows you to work with high-resolution terrain data (e.g., 1-meter LiDAR or 30-meter SRTM), producing highly detailed models with sharp elevation contrast and accuracy. Compared to web-based generators, the output is noticeably richer, especially for regions with complex elevation changes or fine surface features.
Customization: Moderate
While not as flexible as a full 3D modeling suite, this workflow offers several useful customization options. You can define exact model extents, scale the output to match specific dimensions, adjust exaggeration, and add a base of configurable thickness. The bonus step of using Microsoft 3D Builder to add custom labels or annotations gives the final model a personalized or professional touch, ideal for gifts, presentations, or displays.
Tutorial 3: USGS + Blender + Fusion 360 – Advanced Terrain Modeling
Skill Level: Advanced | Quality: Very High | Customization: Extensive
Software Used: USGS Earth Explorer (free) | Blender (free) | Fusion 360 (free for personal use)
Note: The tutorial references TerrainParty, which is no longer available. A current alternative is 3D-Mapper.com.
For users who want full creative control over their 3D terrain models—from raw elevation data to customized geometry, base design, and embedded labels—this advanced workflow offers the highest degree of flexibility. It combines USGS data, powerful modeling in Blender, and precise CAD control in Fusion 360. This method is especially useful for advanced hobbyists, designers, educators, or professionals looking to create unique and complex landscape models.
Summary of the Process:
- Use USGS Earth Explorer to obtain elevation data.
- Displace a subdivided mesh in Blender to model terrain.
- Edit and export to Fusion 360 for base and text.
- Finalize STL and prep for slicing.
Skill Level: Advanced
This workflow assumes comfort with 3D software interfaces and an understanding of elevation data formats. Blender requires some practice to use efficiently, and Fusion 360 introduces a separate set of CAD-based tools. However, the linked tutorial is comprehensive and beginner-friendly, offering a great learning opportunity for those ready to level up.
Quality: Very High
By manually importing and shaping the terrain mesh in Blender and refining it in Fusion 360, you can produce highly detailed, smooth, and polished models. The output quality is often superior to plugin-based workflows because you can fine-tune every element—from mesh resolution to support structure and visual detailing.
Customization: Extensive
This method offers the highest degree of customization of all three tutorials. You can add:
- Custom model shapes (circular, curved, polygonal)
- Labels, text, or logos directly embedded into the base or terrain
- Cutaways, embedded map insets, or coordinate notches
- Stylized exaggeration or design elements not possible in simpler tools
It’s ideal for gifts, commemorative models, or architectural displays where precision and creative freedom are top priorities.
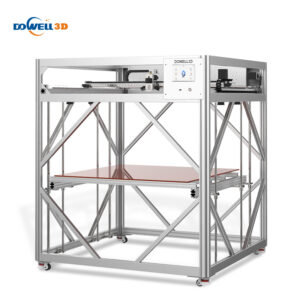
💡 Pro Tip: Check out our 3D printer recommendations
Want to print HUGE? Check out our guide for large format 3D printers Best Large Format 3D Printers for CHEAP 2025 or our recommendations for smaller 3D printers Buyer’s Guide: Best 3D Printers for Topographic Maps .
Pick the Best Tutorial for You
Choosing the right method for 3D printing terrain depends on your experience level, how much control you want over the final model, and how much time you’re willing to invest. Here’s a quick breakdown to help you decide:
Beginner-Friendly: Tutorial 1 TouchTerrain
If you’re just getting started and want a fast, no-download solution, TouchTerrain is the best option. It’s browser-based, free, and delivers solid results with minimal setup. You can go from map to model in minutes, making it perfect for educators, students, or hobbyists.
Intermediate: Tutorial 2 OpenTopography + QGIS
This approach gives you more control and higher-resolution outputs while staying in the realm of free software. Ideal if you want to define your model boundaries, exaggerate terrain, and make simple edits like adding text.
Advanced: Tutorial 3 USGS + Blender + Fusion 360
If you’re comfortable with 3D modeling or want full creative freedom, this is the way to go. From terrain shape to embedded labels and complex bases, this workflow allows total customization.
| Feature | Tutorial 1: TouchTerrain | Tutorial 2: OpenTopography + QGIS | Tutorial 3: USGS + Blender + Fusion 360 |
|---|---|---|---|
| Skill Level | Beginner | Intermediate | Advanced |
| Software Required | Browser only | QGIS, DEMto3D, 3D Builder (optional) | USGS Data, Blender, Fusion 360 |
| Setup Time | < 15 minutes | ~30–60 minutes | 1–2 hours (initial setup) |
| Customization | Low | Moderate | Extensive |
| Output Quality | Good | High | Very High |
| Best For | Quick projects, classrooms | Hobbyists, educators, enthusiasts | Designers, artists, advanced makers |
| Labels/Text | No | Optional (3D Builder) | Full custom engraving |
| Base Shape Options | Standard rectangle | Adjustable in plugin | Any shape (circular, tapered, notched) |
Know Another Great Tutorial?
Have you used a different method to create stunning 3D-printed terrain?
Share your favorite tutorials or workflows in the comments below — we’d love to see what tools and techniques you’ve found helpful!